
humanscale m8.1 dual monitor manual
Humanscale M8.1 Dual Monitor Arm: A Comprehensive Manual Guide
This guide details the Humanscale M8.1, focusing on setup, adjustments, troubleshooting, and maintenance,
leveraging insights from recent discussions regarding LinkedIn’s API and URN integration for related content display.
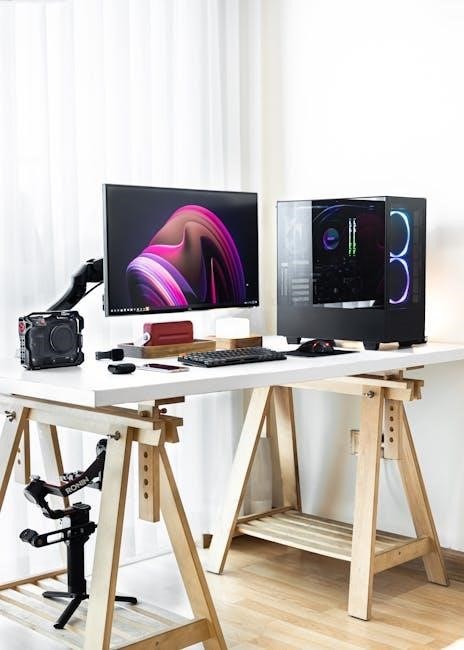
The Humanscale M8.1 Dual Monitor Arm represents a premium ergonomic solution designed to enhance workspace flexibility and productivity. This arm is engineered to accommodate a wide range of monitor sizes and weights, promoting a healthier and more comfortable working posture. Recent online discussions highlight the importance of seamless integration with platforms like LinkedIn, referencing Share URNs for content association.
Unlike simple monitor stands, the M8.1 offers dynamic adjustability, allowing users to position their displays for optimal viewing angles and reduced strain. Understanding compatibility, particularly VESA standards, is crucial for successful installation. The arm’s robust construction ensures long-term durability, while its integrated cable management system maintains a clean and organized workspace.
This manual will guide you through every step, from unboxing and assembly to advanced features and troubleshooting, ensuring you maximize the benefits of your Humanscale M8.1. It acknowledges the evolving digital landscape, including API restrictions noted in discussions about LinkedIn access.
Key Features and Benefits
The Humanscale M8.1 boasts several key features, including effortless height, tilt, pan, and swivel adjustments, promoting ergonomic comfort and reducing physical strain. Its robust build quality ensures stability even with larger, heavier monitors, a crucial aspect for long-term use. Integrated cable management neatly conceals wires, creating a cleaner, more organized workspace.
Benefits extend beyond ergonomics; the M8.1 frees up valuable desk space and enhances workflow efficiency. Compatibility with VESA standards allows for broad monitor support, while the arm’s design accommodates both standard and ultrawide displays.
Interestingly, online discussions touch upon the importance of unique identifiers like LinkedIn Share URNs, suggesting a focus on interconnected digital workflows. The M8.1, while primarily a physical product, supports this by enabling a more focused and productive digital experience. Its durability ensures lasting value, minimizing the need for frequent replacements.

Setting Up Your Humanscale M8.1
Proper installation is key for optimal performance. This section guides you through unboxing, component verification, monitor attachment, and secure desk mounting procedures.
Unboxing and Component Checklist
Carefully unpack your Humanscale M8.1 Dual Monitor Arm and verify all components are present. The box should contain two monitor mounts (left and right), the crossbar, the desk clamp or grommet mount, a cable management cover, and an installation guide. Confirm the presence of all screws and washers, as these are crucial for secure attachment.
Inspect each part for any shipping damage. If any components are missing or damaged, contact Humanscale customer support immediately. Do not attempt to assemble the arm with missing or damaged parts. A complete checklist is often included within the packaging; use it to systematically confirm everything is accounted for.
Familiarize yourself with the different parts before beginning the installation process. Understanding each component will streamline the setup and ensure a stable, ergonomic workstation. Proper preparation prevents frustration during assembly.
Attaching the Monitor Mounts
Begin by selecting the appropriate screws for your monitor’s VESA mounting pattern. The Humanscale M8.1 supports various VESA sizes; consult your monitor’s documentation to determine the correct screw length and diameter. Ensure the screws do not overtighten, which could damage the monitor.
Carefully align the monitor mount with the VESA holes on the back of your monitor. Gently screw the mount into place, ensuring a secure and flush fit. Repeat this process for the second monitor mount. Double-check that both mounts are firmly attached before proceeding.
Once both mounts are secured, verify their stability. Gently tug on each mount to confirm they are properly affixed to the monitors. A secure attachment is vital for preventing accidental drops or instability.
Mounting the Arm to Your Desk
Before mounting, assess your desk’s structural integrity. The Humanscale M8.1 requires a stable surface to ensure safe operation. Avoid mounting on flimsy or unstable desks. Determine the desired location for the arm, considering cable management and ergonomic positioning.
Position the arm’s base on the chosen location and mark the mounting holes. Use the provided desk mounting plate as a template. Ensure the plate is level before drilling. Drill pilot holes according to the marked locations, using an appropriately sized drill bit.
Secure the base to the desk using the provided bolts and washers. Tighten the bolts firmly, but avoid overtightening, which could damage the desk surface. Double-check the stability of the mounted arm before attaching the monitor mounts.

Adjusting and Positioning Your Monitors
Optimal monitor placement enhances ergonomics and productivity. Fine-tune height, tilt, pan, and swivel for personalized comfort, maximizing viewing angles and minimizing strain.
Height Adjustment
Achieving the correct monitor height is crucial for ergonomic comfort and preventing neck strain. The Humanscale M8.1 allows for a wide range of vertical adjustment, accommodating various user heights and desk configurations. To adjust the height, gently lift or lower the monitor attached to the arm.
The arm’s dynamic height adjustment feature provides smooth and effortless positioning. Ensure the top of your monitor screen is at or slightly below eye level when seated in a natural posture. This prevents you from craning your neck upwards or downwards.
Remember to consider the depth of your desk and your seated height when making adjustments. Regularly reassess your monitor height, especially if you share your workspace or experience discomfort. Proper height adjustment contributes significantly to long-term well-being and productivity.
Tilt Adjustment
The Humanscale M8.1’s tilt adjustment feature allows you to angle your monitor screen for optimal viewing comfort and reduced glare. To adjust the tilt, gently apply pressure to the top of the monitor frame. The arm provides a smooth and controlled tilting motion, enabling you to find the perfect viewing angle.
Adjust the tilt to minimize reflections from overhead lights or windows, ensuring a clear and comfortable visual experience. A slight upward tilt can be beneficial for reducing neck strain, while a downward tilt may be preferable for certain tasks.
Experiment with different tilt angles to find what works best for your individual needs and preferences. Remember to maintain a balanced posture and avoid excessive tilting, which could lead to discomfort. Regular adjustments can enhance your overall ergonomic setup.
Pan Adjustment
The Humanscale M8.1’s pan adjustment allows horizontal movement of your monitor, enabling you to share your screen with colleagues or achieve a wider viewing angle. To pan, gently move the monitor left or right along the arm’s horizontal axis. The mechanism is designed for smooth, effortless movement, providing precise positioning.
Pan adjustment is particularly useful in collaborative workspaces, facilitating easy screen sharing during meetings or presentations. It also allows for flexible positioning to accommodate different viewing distances and preferences. Ensure the movement is smooth and doesn’t require excessive force.
Consider the surrounding environment and ensure sufficient space for the monitor’s horizontal range of motion. Regular panning can help maintain a comfortable and ergonomic setup, reducing strain and promoting productivity.
Swivel Adjustment
The Humanscale M8.1’s swivel adjustment feature enables rotation of the monitor around its mounting point, offering exceptional viewing flexibility. This is ideal for quickly shifting between tasks or sharing your screen with nearby colleagues. Gently rotate the monitor to the desired angle; the mechanism is engineered for smooth, controlled movement.
Swivel functionality is particularly beneficial in dynamic work environments where frequent screen sharing is necessary. It allows for effortless transitions between individual work and collaborative discussions. Ensure the swivel range doesn’t obstruct surrounding objects or create ergonomic issues.
Regularly utilizing the swivel adjustment can contribute to a more comfortable and adaptable workspace, minimizing strain and maximizing productivity. Remember to maintain a balanced setup for optimal viewing.

Cable Management with the M8.1
The M8.1 boasts an integrated system for tidy cable routing, preventing strain and maintaining a clean workspace, similar to optimizing LinkedIn content URNs.
Integrated Cable Management System
The Humanscale M8.1 features a remarkably well-designed integrated cable management system, a crucial element for maintaining a clean and organized workspace. This system isn’t merely an afterthought; it’s built directly into the arm’s structure, offering a streamlined solution to the often-messy problem of multiple monitor cables. Cables are neatly channeled within the arm itself, concealing them from view and preventing tangling.
This internal routing minimizes visual clutter, contributing to a more professional aesthetic. The design also protects cables from accidental damage or disconnection. Consider this similar to how LinkedIn utilizes Share URNs – a hidden, yet vital, system for identifying and referencing content. The M8.1’s system accommodates power cables, HDMI, DisplayPort, USB, and audio cables, providing ample space for most common monitor setups. It’s a significant upgrade over external cable sleeves or ties, offering a more permanent and elegant solution.
Routing Cables Through the Arm
Successfully routing cables through the Humanscale M8.1 arm requires a methodical approach. Begin by disconnecting all cables from your monitors and computer. Gently feed the cables into the arm’s entry points, typically located near the base and monitor mounting points. Utilize the provided channels and guides within the arm to direct the cables along the intended path.
Avoid forcing cables, as this could damage them or the arm’s internal components. Think of it like navigating LinkedIn’s API – precision is key! Ensure sufficient slack is left at both ends to allow for full monitor adjustment without straining the cables. Secure the cables within the arm using the integrated clips or retainers. Finally, reconnect the cables to your monitors and computer, verifying all connections are secure. Proper routing minimizes cable visibility and maximizes the arm’s aesthetic appeal.
Preventing Cable Strain
Minimizing cable strain is crucial for the longevity of your Humanscale M8.1 setup. Avoid sharply bending cables within the arm’s channels; gentle curves are preferred. Ensure adequate cable length to accommodate the full range of monitor motion – similar to needing sufficient access when navigating LinkedIn’s restricted API permissions. Regularly inspect cables for kinks, twists, or signs of damage.
Securely fasten cables using the arm’s integrated management features to prevent them from being pulled or snagged during adjustments. Avoid overloading the cable channels with excessive cables, as this can create pressure points. Consider using high-quality cables with flexible jackets. Like a well-structured LinkedIn Share URN, a clean and organized cable setup contributes to a reliable and frustration-free experience.

Troubleshooting Common Issues
Addressing common problems like monitor sagging or adjustment difficulties is vital. Consider desk compatibility and API access restrictions, mirroring LinkedIn’s challenges.
Monitor Sagging or Drooping
If your monitors exhibit sagging or drooping, several factors could be at play. First, ensure the arm is correctly mounted to your desk and that all mounting screws are securely tightened – periodic checks are crucial for long-term stability. Verify that the weight of your monitors doesn’t exceed the M8.1’s specified weight capacity; exceeding this limit will inevitably lead to instability.
Secondly, confirm that the tension adjustment knob (if equipped on your model) is properly set. Increasing the tension can provide additional support. Also, check the monitor mounts themselves; ensure they are firmly attached to the monitors using the appropriate VESA screws.
Consider the monitor’s center of gravity; uneven weight distribution can exacerbate sagging. Finally, mirroring challenges seen with LinkedIn’s API permissions, sometimes a seemingly correct setup requires re-evaluation of all connections and adjustments. If issues persist, contact Humanscale support for assistance.
Difficulty Adjusting the Arm
Encountering resistance when adjusting the Humanscale M8.1 arm is a common issue, often stemming from overly tight tension settings. Begin by loosening the tension adjustment knob, allowing for smoother movement. Ensure no cables are obstructing the arm’s range of motion – proper cable management is vital. If the arm remains stiff, check for any physical obstructions between the arm segments.
Similar to troubleshooting LinkedIn’s API access restrictions, a systematic approach is key. Confirm the desk mounting is secure; a loose base hinders smooth adjustments. Inspect the gas spring mechanism – while generally reliable, it can occasionally require a firm, deliberate push to initiate movement.
Avoid forcing the arm; excessive force can damage the internal components. If problems persist, consult the Humanscale website for detailed troubleshooting guides or contact their customer support for expert assistance.
Desk Compatibility Concerns
The Humanscale M8.1’s compatibility hinges on your desk’s construction and thickness. Desks exceeding 2.4 inches (61 cm) in thickness may require a longer mounting pole, sold separately. Ensure your desk surface is solid and capable of supporting the combined weight of the arm and monitors – hollow core or flimsy desks are unsuitable.
Similar to LinkedIn’s evolving API permissions, careful assessment is crucial. Verify sufficient clearance exists behind the desk for the arm’s range of motion. Consider desks with pre-drilled cable management holes to facilitate clean cable routing, mirroring the M8.1’s integrated system.
Avoid mounting the arm to unstable surfaces. If unsure, consult a professional installer. Like addressing issues with LinkedIn’s Share URN implementation, a solid foundation is paramount for optimal performance and safety.

Advanced Features & Considerations
Explore VESA compatibility, ultrawide monitor support, and LinkedIn Share URN integration for enhanced functionality, mirroring API access considerations for optimal content display.
Understanding Monitor VESA Compatibility
VESA (Video Electronics Standards Association) compatibility is crucial for mounting your monitors to the Humanscale M8.1. VESA defines standardized mounting hole patterns on the back of displays. The M8.1 supports a wide range of VESA patterns, typically 75x75mm and 100x100mm, but always verify your monitor’s specifications.

Before attaching your monitor, identify its VESA pattern. This information is usually found in the monitor’s manual or on the manufacturer’s website. Ensure the M8.1’s mounting interface aligns with your monitor’s VESA holes. Using incorrect screws or forcing the connection can damage both the monitor and the arm.
The M8.1 often includes various screw sizes to accommodate different VESA standards. If your monitor requires a different screw size, consult a hardware store for compatible replacements. Proper VESA compatibility ensures a secure and stable monitor setup, preventing potential accidents and maximizing the arm’s functionality.
Using the Humanscale M8;1 with Ultrawide Monitors
Utilizing the Humanscale M8.1 with ultrawide monitors requires careful consideration due to their size and weight. While the M8.1 is robust, exceeding its weight capacity can compromise stability and potentially damage the arm or monitor. Always check the M8.1’s maximum weight limit per arm – typically around 17.6 lbs (8kg).
Ultrawide monitors often have non-standard VESA patterns. Verify compatibility before mounting, potentially requiring adapters. Ensure the desk is sturdy enough to support the combined weight and leverage of the ultrawide display. Proper desk mounting is paramount for safety.
Adjusting the arm’s tension is crucial for ultrawide monitors. Increase the tension to counteract the added weight and prevent sagging. Regularly inspect the mounting screws and arm joints for tightness. Consider using a single ultrawide instead of two smaller monitors to simplify setup and reduce strain on the arm.
LinkedIn Share URN Integration (for related display of shared content)
Integrating LinkedIn Share URNs allows for dynamic display of related content alongside your Humanscale M8.1 setup information. A LinkedIn Share URN, a unique identifier, points directly to a specific post or share on the LinkedIn platform – essentially a digital address. This enables embedding relevant discussions, product announcements, or user testimonials.
To implement this, you’ll need to extract the URN from the LinkedIn post’s URL. Note the distinction: it’s “Share URN,” not “shar.” Utilizing APIs (though access is restricted and requires partnership approval) facilitates automated URN retrieval and content embedding.

Displaying these URNs can enhance user engagement by providing contextual information. However, be mindful of LinkedIn’s API limitations, particularly regarding permissions like r_liteprofile and w_member_social, which necessitate app approval. Consider using custom buttons for sharing, bypassing LinkedIn’s built-in generator for image control.

Maintenance and Care
Regular cleaning and periodic checks of mounting screws ensure long-term durability of your Humanscale M8.1 arm, maintaining optimal performance and stability.
Cleaning the M8.1 Arm
To maintain the pristine condition and smooth operation of your Humanscale M8.1 dual monitor arm, regular cleaning is essential. Begin by disconnecting the arm from any power sources and gently dusting all surfaces with a soft, microfiber cloth. Avoid abrasive cleaners or solvents, as these can damage the finish.
For stubborn marks or fingerprints, lightly dampen the microfiber cloth with a mild soap and water solution. Ensure the cloth is only damp, not wet, to prevent liquid from entering the arm’s internal mechanisms. Wipe down the arm thoroughly, then use a dry microfiber cloth to remove any remaining moisture.
Pay particular attention to areas where dust tends to accumulate, such as the joints and cable management channels. Consistent cleaning not only enhances the aesthetic appeal of the M8.1 but also contributes to its longevity and reliable performance. Remember to always prioritize gentle cleaning methods to preserve the arm’s finish and functionality.
Periodic Check of Mounting Screws
Maintaining the secure attachment of your Humanscale M8.1 is paramount for safety and optimal performance. Regularly – ideally every three to six months – inspect all mounting screws, including those securing the arm to the desk and the monitor mounts to the VESA interface.
Use a properly sized screwdriver to gently tighten any screws that feel loose. Avoid over-tightening, as this could strip the threads or damage the components. Pay close attention to the desk mounting screws, ensuring they remain firmly anchored to provide a stable base.
A wobbly arm or monitors that shift position are clear indicators that screws need attention. This proactive maintenance prevents potential accidents and ensures the long-term durability of your M8.1. Consistent checks, combined with careful tightening, contribute significantly to a safe and reliable workstation setup.
Long-Term Durability
The Humanscale M8.1 is engineered for lasting performance, but maximizing its lifespan requires mindful use and care. Constructed with high-quality materials, the arm is designed to withstand daily adjustments and the weight of your monitors. However, consistent maintenance, like periodic screw checks, is crucial.
Avoid exceeding the specified weight capacity for each monitor mount, as this can strain the arm’s mechanisms. Protect the arm from extreme temperatures and direct sunlight, which can degrade plastic components over time.
Regular cleaning, using a soft, damp cloth, prevents dust buildup that could affect smooth operation. Considering LinkedIn’s evolving API access restrictions, the M8.1’s robust build ensures continued functionality independent of external platform changes, offering a reliable ergonomic solution for years to come.