
hayman reese brake controller manual
Hayman Reese Brake Controller Manual: A Comprehensive Guide
This manual provides detailed guidance on Hayman Reese brake controllers‚ essential for safe towing. It covers installation‚ setup‚ troubleshooting‚ and maintenance‚ ensuring optimal performance.
Explore the CompactIQ model’s features and learn how to adjust settings for proportional or time-activated braking systems. Access wiring diagrams and technical support.
Hayman Reese stands as a leading aftermarket towing manufacturer‚ renowned for quality and innovation in trailer braking systems. Their brake controllers are crucial safety components‚ designed to synchronize braking between your tow vehicle and caravan‚ minimizing accident risk.
This manual focuses on Hayman Reese controllers‚ including the sophisticated CompactIQ‚ a proportional version building upon the established Compact unit. Understanding your controller’s function is paramount. These units offer enhanced driver control and simplified installation processes.
Proper setup‚ as detailed within‚ ensures optimal braking performance; Always consult both your vehicle and trailer owner’s manuals alongside this guide for comprehensive compatibility and safe towing practices.
Understanding the Importance of Brake Controllers
A brake controller is an absolutely essential safety device when towing a caravan or trailer. Without one‚ the tow vehicle’s brakes alone may be insufficient to safely decelerate the combined weight‚ leading to extended stopping distances and potential loss of control.
Hayman Reese controllers address this by applying the trailer’s brakes in proportion to the tow vehicle’s braking effort – or‚ in time-activated systems‚ at a set intensity. This synchronized braking ensures stability and minimizes sway.
Regular testing of your brake control unit‚ as outlined in this manual‚ is vital. Prioritize safety by understanding and utilizing the features of your Hayman Reese controller.

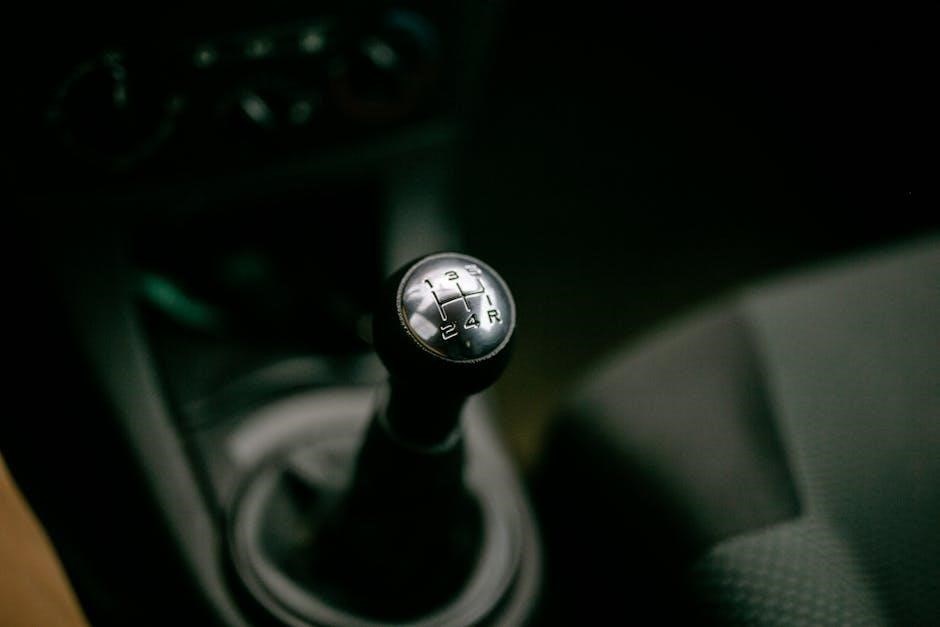
Hayman Reese CompactIQ Brake Controller
The CompactIQ is a sophisticated‚ proportional brake controller offering easier installation and enhanced driver control for safer towing experiences.
It’s a newer version of the Compact unit‚ designed for optimal performance.
Key Features of the CompactIQ Model
The Hayman Reese CompactIQ boasts several key features designed for superior towing control and ease of use. As one of their most sophisticated units‚ it offers proportional braking‚ meaning brake force adjusts to the trailer’s weight and deceleration.
This model simplifies installation‚ making it accessible for a wider range of users. It provides drivers with greater control‚ enhancing safety and confidence while towing. The CompactIQ is designed for remote mounting‚ offering flexibility in placement within the vehicle.
Furthermore‚ it’s compatible with a broad range of vehicles and trailers‚ ensuring versatility. Users benefit from intuitive adjustments and reliable performance‚ making it a standout choice for caravan and trailer towing. It’s a significant upgrade from time-activated systems.
Proportional vs. Time-Activated Controllers
Hayman Reese offers both proportional and time-activated brake controllers‚ each with distinct operational characteristics. Time-activated controllers apply a set braking force for a predetermined duration‚ regardless of trailer weight or vehicle deceleration. They are simpler in design but may offer less refined control.
Proportional controllers‚ like the CompactIQ‚ dynamically adjust braking force based on the vehicle’s deceleration and the trailer’s weight. This results in smoother‚ more responsive braking‚ mirroring the vehicle’s performance.
Proportional braking minimizes trailer sway and enhances safety‚ particularly in emergency situations. While generally more sophisticated and potentially pricier‚ proportional controllers provide a superior towing experience and greater control over trailer braking.

Installation Guide
This section details the Hayman Reese brake controller installation process. It covers required tools‚ wiring diagrams‚ and step-by-step instructions for a secure fit.
Tools Required for Installation
Before beginning the Hayman Reese brake controller installation‚ gather the necessary tools for a smooth process. You will need a standard screwdriver set‚ including Phillips and flathead options‚ to secure mounting brackets and connect wiring. A wire stripper and crimper are crucial for preparing and joining wires effectively.
Electrical tape is essential for insulating connections‚ preventing shorts and ensuring safety. A multimeter will be invaluable for testing voltage and continuity‚ verifying proper wiring. Consider a drill with appropriate bits for creating mounting holes if needed. Pliers‚ both standard and needle-nose‚ will assist with wire manipulation and securing connections. Finally‚ a wiring diagram specific to your vehicle and controller is absolutely essential for correct installation.
Wiring Diagram Overview
Understanding the Hayman Reese brake controller wiring diagram is paramount for a successful installation. Typically‚ you’ll encounter a 12V supply wire‚ often red‚ requiring connection to a fused ignition source. A ground wire‚ usually white‚ needs secure attachment to the vehicle’s chassis. The brake light input wire‚ commonly white or brown‚ connects to the vehicle’s stop light circuit.
Furthermore‚ a brake output wire‚ often blue‚ transmits the signal to the trailer brakes. Hayman Reese provides universal and vehicle-specific diagrams‚ accessible online at haymanreese.com.au/wiringinstructions. Always verify wire colors with your vehicle’s manual‚ as variations exist. Careful adherence to the diagram ensures correct functionality and prevents electrical issues.
Step-by-Step Installation Process
Begin by disconnecting the vehicle’s negative battery terminal. Mount the Hayman Reese controller in a readily accessible location‚ avoiding direct sunlight. Connect the 12V supply‚ ground‚ and brake light input wires‚ referencing the wiring diagram. Securely attach all connections‚ utilizing butt connectors or solder for reliability.
Next‚ connect the brake output wire to the trailer connector. Reconnect the battery and test the controller’s functionality. Adjust the brake gain and sensitivity settings as needed. A video demonstrating the installation process for an Isuzu D-MAX is available online‚ providing a visual guide. Always consult the owner’s manual for vehicle-specific instructions.
Universal Fitment Considerations
Hayman Reese brake controllers are designed for broad compatibility‚ but universal fitment requires careful attention. Ensure sufficient space for mounting the unit‚ avoiding interference with steering wheel or dashboard components. Verify the vehicle’s electrical system is compatible with the controller’s 12V DC power requirement.
The installation harness‚ available separately‚ simplifies wiring for many vehicles. However‚ some vehicles may necessitate custom wiring connections. Always refer to the wiring instructions on the Hayman Reese website for specific diagrams. Proper grounding is crucial for optimal performance; ensure a solid connection to the vehicle’s chassis.
Vehicle-Specific Installation Notes
Hayman Reese acknowledges that installation can vary significantly between vehicles. Consult your vehicle’s owner’s manual for specific wiring information and potential compatibility issues. Some vehicles may require a factory brake controller adapter harness for seamless integration.
For the 2021 Isuzu D-MAX X-Terrain‚ a common installation location is behind the dash‚ utilizing existing mounting points. Always disconnect the negative battery terminal before commencing any electrical work. Refer to online resources and Hayman Reese’s website for vehicle-specific guides and potential challenges. Prioritize safety and double-check all connections before restoring power.

Setting Up Your Hayman Reese Controller
Proper setup is crucial for optimal braking. Adjust brake gain and sensitivity settings according to your trailer’s weight and vehicle load. Utilize the manual override function as needed.
Adjusting Brake Gain
Brake gain controls the amount of braking force applied to the trailer. Start with a low setting and gradually increase it during a test drive. Observe the trailer’s braking response; it should be proportional to the vehicle’s braking.
Too little gain results in weak trailer brakes‚ potentially causing instability. Too much gain can cause the trailer brakes to lock up‚ leading to skidding. Consult your vehicle and trailer owner’s manuals for recommended gain settings.
Hayman Reese recommends testing brake functionality each time a trailer is attached. Adjust the gain until the trailer brakes feel balanced with the towing vehicle‚ ensuring safe and controlled stopping power; Remember to prioritize safety and gradual adjustments.
Sensitivity Settings Explained
Sensitivity settings on your Hayman Reese controller determine how quickly the trailer brakes respond to initial braking. Higher sensitivity means quicker activation‚ ideal for lighter trailers or slippery conditions. Lower sensitivity provides a more gradual response‚ suitable for heavier loads or dry surfaces.
Adjusting sensitivity ensures optimal braking performance tailored to your specific towing setup. Begin with a moderate setting and fine-tune based on road conditions and trailer weight. Incorrect sensitivity can lead to jerky stops or delayed braking.
Experiment during controlled test drives to find the ideal balance. Refer to the owner’s manual for detailed guidance and recommended settings for various scenarios‚ prioritizing safety and control.
Manual Override Function
The Manual Override function on your Hayman Reese brake controller allows for independent control of the trailer brakes‚ regardless of the vehicle’s braking system. This feature is crucial in emergency situations or when descending steep grades where additional braking force is needed.
Activating manual override typically involves a dedicated button or lever on the controller. Use it cautiously and in short bursts to avoid locking the trailer wheels. It’s a safety net‚ providing extra stopping power when required.
Familiarize yourself with the location and operation of the override before towing. Consult the owner’s manual for specific instructions and safety precautions related to your controller model.

Troubleshooting Common Issues
This section addresses frequent problems like controller unresponsiveness‚ brake activation failures‚ and deciphering error codes for your Hayman Reese unit.
Solutions and diagnostic steps are provided to restore optimal functionality and towing safety.
Controller Not Responding
If your Hayman Reese brake controller fails to power on or respond‚ begin by verifying the primary power connection. Ensure the controller is receiving a stable 12V supply from the vehicle’s electrical system. Check the inline fuse associated with the controller; a blown fuse is a common cause of complete failure.
Next‚ inspect the ground connection. A loose or corroded ground can prevent the controller from functioning correctly. Confirm the ground wire is securely attached to a clean‚ unpainted metal surface on the vehicle’s chassis. Also‚ verify the connection at the brake controller itself. If these checks don’t resolve the issue‚ consult the vehicle’s owner’s manual to confirm compatibility and any specific wiring requirements.
Finally‚ consider if a recent electrical modification might have disrupted the power supply.
Brakes Not Activating
If the trailer brakes aren’t activating despite the controller displaying activity‚ first check the wiring connection between the controller and the trailer. Inspect the seven-pin connector for corrosion‚ loose wires‚ or damage. Ensure the trailer’s brake wiring is intact and properly connected to the trailer’s electric brakes.
Verify the brake gain setting on the controller isn’t set too low. Gradually increase the gain to determine if the brakes respond. Also‚ confirm the manual override function isn’t engaged‚ as this can sometimes interfere with automatic activation. If the issue persists‚ examine the trailer’s brake magnets and drums for wear or damage‚ potentially requiring professional servicing.
Always test functionality after any adjustments.
Error Codes and Their Meanings
Hayman Reese CompactIQ brake controllers utilize error codes to diagnose potential issues. While specific codes vary by model‚ common indicators signal wiring faults or communication errors. A flashing light‚ or a specific numerical display‚ often denotes a problem requiring attention. Consult your controller’s specific owner’s manual for a comprehensive list of error codes and their corresponding meanings.
For example‚ a continuous flashing light might indicate a short circuit in the trailer wiring‚ while an intermittent flash could suggest a loose connection. Addressing these codes promptly ensures safe towing. If you are unable to decipher the code‚ contact Hayman Reese technical support for assistance.

Safety and Maintenance
Regular testing of your Hayman Reese controller is crucial for safety. Inspect wiring‚ connections‚ and functionality before each tow‚ consulting the owner’s manual.
Testing Brake Functionality
Thoroughly testing your Hayman Reese brake controller is paramount to ensuring safe towing. Begin by performing a static test: with the vehicle and trailer stationary‚ apply the trailer brakes manually using the controller. Observe if the trailer brakes engage firmly and consistently.
Next‚ conduct a low-speed road test in a safe‚ open area. Gradually increase speed to 30-40 km/h and apply the trailer brakes. Verify that the trailer brakes respond proportionally to the controller setting‚ maintaining a straight and stable trajectory.
Pay attention to any unusual noises‚ pulling‚ or instability. Consult the owner’s manual for specific testing procedures and recommended settings. Remember to test the brakes each time a trailer is attached to your vehicle‚ as conditions and loads can vary.
Regular Inspection Checklist
Consistent inspection of your Hayman Reese brake controller is crucial for reliable performance. Begin by visually checking all wiring connections for corrosion‚ damage‚ or looseness. Ensure the controller unit itself is securely mounted and free from debris.
Verify the functionality of the manual override switch‚ confirming it engages and disengages smoothly. Inspect the trailer connector for proper pin alignment and cleanliness. Regularly test the brake lights on the trailer to ensure they illuminate correctly when the brakes are applied.
Review the controller settings periodically to confirm they align with the current trailer weight and road conditions. Consult the owner’s manual for detailed inspection guidelines and recommended intervals.
Consulting the Owner’s Manual
Your Hayman Reese brake controller’s owner’s manual is an invaluable resource. It contains specific details regarding your model‚ including detailed installation instructions‚ wiring diagrams‚ and troubleshooting guides. Familiarize yourself with the controller’s features‚ settings‚ and limitations.
The manual provides crucial information on adjusting brake gain and sensitivity for optimal performance with varying trailer weights and road conditions. It also outlines safety precautions and maintenance schedules to ensure long-term reliability.
Always refer to the manual before attempting any repairs or modifications. It’s essential to test brake functionality after each trailer attachment‚ as detailed within the manual’s guidelines.

Hayman Reese Wiring Instructions
Hayman Reese provides comprehensive wiring instructions‚ including color-coded diagrams‚ accessible online and within the controller’s manual. Proper wiring ensures safe operation.
Follow these guides carefully for correct connections and optimal brake controller performance.
Understanding Wire Colors
Hayman Reese brake controller wiring utilizes a standardized color scheme‚ though variations can occur depending on the vehicle and controller model. Typically‚ the red wire signifies 12V power‚ requiring connection to a fused ignition source. The white wire serves as the ground‚ essential for completing the electrical circuit and should be connected to the vehicle’s chassis.
The blue wire is the brake light input‚ triggered when the vehicle’s brakes are applied‚ signaling the controller to activate the trailer brakes. Green and brown wires are often associated with left and right turn/brake signal outputs‚ respectively. Always consult the specific wiring diagram for your vehicle and controller‚ as these colors can differ. Incorrect wiring can lead to malfunction or damage‚ so meticulous attention to detail is crucial. Referencing the owner’s manual is highly recommended.
Accessing Wiring Diagrams Online
Hayman Reese provides comprehensive wiring diagrams readily accessible through their official website: www.haymanreese.com.au/wiringinstructions. This online resource offers a vast library of diagrams categorized by vehicle make and model‚ simplifying the installation process. Users can easily search for their specific vehicle to find the correct wiring configuration.
These diagrams detail the precise connections required for various Hayman Reese brake controller models. Additionally‚ many automotive forums and online communities dedicated to towing and vehicle modifications often host user-submitted wiring diagrams and helpful installation tips. Always verify the accuracy of information found on third-party sites against the official Hayman Reese documentation to ensure a safe and correct installation.

Resources and Support
Hayman Reese offers extensive support via their website. For technical assistance‚ contact their support team directly for expert guidance and troubleshooting.
Hayman Reese Website
Hayman Reese’s official website‚ www.haymanreese.com.au‚ serves as a central hub for all product-related information. Users can find comprehensive details about each brake controller model‚ including specifications‚ features‚ and compatibility guides;
A dedicated section provides access to downloadable manuals‚ wiring instructions‚ and installation guides for various vehicle makes and models. The website also features helpful resources like frequently asked questions (FAQs) and informative articles on towing safety and best practices.
Furthermore‚ the site offers a dealer locator to help customers find authorized Hayman Reese retailers and service centers in their area. Regularly updated with the latest product news and support materials‚ the website is an invaluable resource for owners and installers alike.
Technical Support Contact Information
For direct assistance with your Hayman Reese Brake Controller‚ contacting their technical support team is recommended. While specific contact details may vary‚ generally‚ customers can reach support through the Hayman Reese website’s contact form‚ submitting inquiries online.
Alternatively‚ phone support is often available during business hours; checking the website for the most current phone number is advised. When contacting support‚ having your controller’s model number and date of purchase readily available will expedite the process.
Detailed troubleshooting guides and FAQs are also available online‚ potentially resolving common issues without direct contact. Hayman Reese prioritizes customer satisfaction and aims to provide prompt and effective technical assistance.