
dyson vacuum dc14 owners manual
Dyson DC14 Owners Manual: A Comprehensive Guide
Welcome! This comprehensive guide details everything about your Dyson DC14. Explore safety‚ assembly‚ usage‚ maintenance‚ troubleshooting‚ and warranty details for optimal cleaning performance.
Find free PDF manuals‚ learn about Radial Root Cyclone™ technology‚ and access Dyson Helpline support at 1-877-397-6622 for your vacuum.
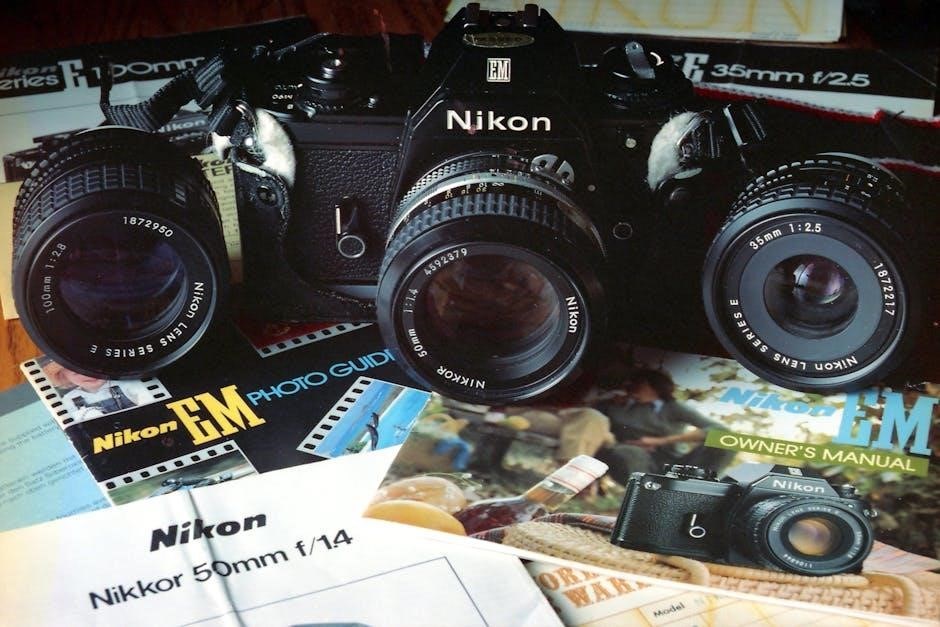
The Dyson DC14 represents a significant advancement in vacuum cleaner technology‚ utilizing Radial Root Cyclone™ technology for powerful suction that doesn’t diminish. This upright vacuum is designed for homes with both carpets and hard floors‚ offering versatile cleaning capabilities;
This guide provides detailed instructions on assembling‚ using‚ and maintaining your DC14‚ ensuring optimal performance and longevity. Familiarize yourself with the components and safety precautions before initial use. Enjoy a cleaner home with your Dyson!

Safety Instructions
Important: Always disconnect the Dyson DC14 from the power outlet before maintenance or troubleshooting. Do not use with damaged cords or plugs. Never operate the vacuum near water or flammable liquids.
Keep hair‚ loose clothing‚ and fingers away from moving parts. Use only Dyson accessories. This appliance is not intended for use by persons with reduced physical‚ sensory‚ or mental capabilities. Supervise children to ensure safe operation.
Box Contents – What’s Included

Your Dyson DC14 box should contain the main body‚ a hose‚ a wand‚ and a combination tool. Also included is a crevice tool for reaching tight spaces. Verify the presence of the Owners Manual and warranty information.
Locate the upper cord hook. If any items are missing‚ immediately contact Dyson Helpline at 1-877-397-6622 to ensure a complete and functional vacuum cleaning experience.
Identifying the Components

The Dyson DC14 features a main body housing the cyclone technology. The hose connects to the back‚ enabling extended reach. The wand slides into the hose for above-floor cleaning. Familiarize yourself with the clear bin™ for dust and debris visibility.
Recognize the brushbar within the cleaner head and the upper cord hook for convenient storage. Understanding each component aids in assembly‚ maintenance‚ and optimal performance.
Dyson Helpline Contact Information
For assistance with your Dyson DC14‚ the Dyson Helpline is readily available. You can reach them directly at 1-877-397-6622. This dedicated support line provides expert guidance on troubleshooting‚ maintenance‚ and warranty inquiries.
Their knowledgeable representatives can assist with any questions regarding your vacuum cleaner‚ ensuring optimal performance and a satisfying cleaning experience. Don’t hesitate to reach out!
Assembling Your Dyson DC14
Assembly is straightforward! Begin by sliding the hose securely into the guides located at the back of the machine‚ ensuring it clicks firmly into place. Next‚ gently slide the wand straight down into the designated opening.
These simple steps will have your Dyson DC14 ready for use. Refer to the included diagrams for visual guidance‚ guaranteeing a proper and stable connection for effective cleaning.
Attaching the Hose
Securely connect the hose to your Dyson DC14 by aligning it with the guides positioned at the rear of the machine. Gently but firmly slide the hose into these guides until you hear a distinct ‘click’.
This click confirms a proper and stable connection‚ essential for maintaining optimal suction during operation. Ensure the hose is firmly attached before proceeding to connect the wand for complete assembly.
Connecting the Wand
After attaching the hose‚ proceed to connect the wand to your Dyson DC14. Take the wand and carefully slide it straight down into the open end of the attached hose.
Ensure a snug fit; the wand should slide in smoothly and securely. This connection extends the reach of your vacuum‚ allowing you to clean higher and more distant areas effectively.
Using Your Dyson DC14
Before operation‚ familiarize yourself with all components and ensure proper assembly. Begin with Initial Setup by checking the filter and bin. To Power On and Off‚ use the power button located on the machine.
Always refer to the Owners Manual for detailed instructions. Utilize appropriate tools for various surfaces to maximize cleaning efficiency and prolong your Dyson DC14’s lifespan.
Initial Setup and Preparation

Prior to first use‚ carefully inspect the Dyson DC14 for any shipping damage. Confirm the hose is securely attached to the machine’s rear guides‚ clicking firmly into place. Ensure the wand slides smoothly down into the hose connection.
Verify the bin is correctly installed and the filter is clean. A properly prepared machine guarantees optimal suction and performance‚ as detailed in the Owners Manual.
Powering On and Off
To activate your Dyson DC14‚ press the power button located on the machine’s body. The brushbar will engage‚ indicating the vacuum is ready for cleaning. To deactivate‚ simply press the power button again.
Ensure the machine is fully powered off before attempting any maintenance or troubleshooting‚ as outlined in the Owners Manual. This prevents accidental activation and potential injury.
Washing the Filter – Maintaining Suction
Regularly washing the filter is crucial for maintaining optimal suction power in your Dyson DC14. A dirty filter restricts airflow‚ reducing cleaning effectiveness. Rinse the filter under cold water until the water runs clear‚ as detailed in the Owners Manual.
Allow the filter to dry completely – approximately 24 hours – before reinstalling. Using a damp filter can damage the machine.
Filter Location
The Dyson DC14 filter is located within the machine’s clear bin assembly. Accessing it requires removing the clear bin from the main body of the vacuum. The filter itself is a washable‚ pleated cartridge‚ typically positioned at the rear of the bin‚ easily identifiable by its shape and color.
Refer to your Owners Manual for a detailed diagram illustrating the precise location and removal process.
Washing Procedure and Drying Time
To wash the DC14 filter‚ remove it and rinse under cold water until the water runs clear; Do not use detergents. Gently tap to remove excess water‚ then place on a clean‚ dry surface for a minimum of 24 hours.
Ensure the filter is completely dry before re-installation to prevent damage to the machine and maintain optimal suction performance. A damp filter will reduce cleaning efficiency.
Utilizing Dyson DC14 Tools & Attachments
Your Dyson DC14 comes with versatile tools for comprehensive cleaning; The crevice tool excels in tight spaces‚ corners‚ and along edges. The combination tool offers a brush for dusting and suction for upholstery.
Effectively utilize these attachments by securely connecting them to the wand or hose. Regularly inspect for blockages to maintain optimal suction and cleaning performance throughout your home.
Crevice Tool – For Tight Spaces
The crevice tool is specifically designed for reaching narrow and inaccessible areas. Use it along baseboards‚ between cushions‚ and in tight corners where dust and debris accumulate.
Its slender design allows for precise cleaning in these challenging spots. Ensure a firm connection to the wand or hose for maximum suction. Regularly check for obstructions to maintain effective performance.
Combination Tool – Versatile Cleaning
The combination tool offers adaptable cleaning for various surfaces. Utilize the brush side for dusting furniture‚ curtains‚ and delicate items. Switch to the flat nozzle for cleaning upholstery‚ car interiors‚ and hard-to-reach areas.
This tool’s versatility makes it ideal for above-floor cleaning tasks. Regularly inspect the brush for tangled hair or debris to ensure optimal performance and hygiene.
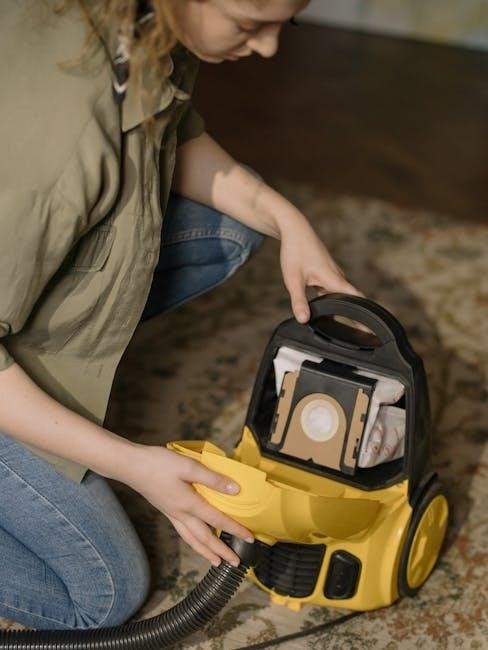
Emptying the Clear Bin™
The Clear Bin™ is easily emptied for hygienic disposal of collected dirt and debris. Locate the release mechanism – typically a red button – on the bin. Press it to release the base‚ allowing the bin to empty directly into a trash receptacle.
Avoid overfilling the bin for optimal suction. Ensure proper disposal of contents‚ and consider bin cleaning for thorough hygiene.
Release Mechanism
The Clear Bin™ utilizes a simple‚ hygienic release mechanism for emptying. Typically‚ a prominent red button is located on the underside of the bin. Pressing this button disengages the bin base‚ allowing it to swing open and deposit the collected dust and debris directly into your waste container.
Ensure the bin is positioned over a trash receptacle before activating the release for a mess-free experience.
Proper Disposal of Contents
After releasing the Clear Bin™ contents‚ dispose of the collected dust and debris responsibly. While generally suitable for standard household waste‚ consider local regulations regarding dust disposal‚ especially if vacuuming potentially hazardous materials.
Avoid overfilling the bin before emptying to prevent clogging. Seal waste bags securely to minimize dust dispersal during disposal‚ maintaining a clean environment.
Cleaning the Clear Bin™
Regularly cleaning the Clear Bin™ ensures optimal suction and performance. For thorough cleaning‚ disassemble the bin following the release mechanism instructions. Use a damp cloth with mild detergent; avoid harsh chemicals or abrasives.
Ensure the bin is completely dry before reassembling. Inspect for any cracks or damage during cleaning. A clean bin contributes significantly to your Dyson DC14’s efficiency.
Disassembly for Thorough Cleaning
To disassemble the Clear Bin™‚ locate the release mechanism – typically a button or lever. Press or slide to detach the bin from the machine. Empty any debris‚ then carefully separate the internal components for individual cleaning.
Pay attention to the cyclone assembly; ensure it’s free from dust and blockages. Reassemble carefully‚ aligning all parts correctly for a secure fit and optimal performance.
Recommended Cleaning Solutions
For cleaning the Clear Bin™ and other DC14 components‚ use mild dish soap diluted in warm water. Avoid harsh chemicals‚ abrasive cleaners‚ or solvents‚ as these can damage the plastic. A soft cloth or brush is ideal for scrubbing.
Ensure all cleaning solutions are thoroughly rinsed away before reassembling. Completely dry all parts before use to prevent mold or mildew growth and maintain suction power.
Clearing Blockages – Troubleshooting Suction Loss
Suction loss often indicates a blockage. First‚ power off and disconnect the DC14. Check the hose‚ wand‚ and brush head for obstructions. Carefully remove any debris – hair‚ dust‚ or larger items.
Inspect the brush bar for tangled hair. A blocked airway significantly reduces cleaning performance. Regular checks prevent buildup and maintain optimal suction throughout your home.
Hose Blockages
Hose blockages are common causes of suction loss. Detach the hose from the DC14 machine. Visually inspect the entire length for visible obstructions. Gently flex the hose to dislodge any trapped debris.
Use a long‚ flexible tool – like a broom handle – to carefully push through any stubborn blockages. Ensure complete clearance before reattaching to restore full suction power.
Wand and Brush Head Blockages
Inspect the wand for obstructions by detaching it from both the hose and the brush head. Shine a light through the wand to identify any blockages. Similarly‚ check the brush head for tangled hair‚ string‚ or larger debris wrapped around the brushbar.
Carefully remove any obstructions to ensure smooth airflow and optimal cleaning performance. Reassemble securely after clearing all blockages.
Brushbar Maintenance
Regular brushbar maintenance is crucial for maintaining suction and cleaning effectiveness. Periodically remove the brushbar to inspect it for accumulated hair‚ fibers‚ and debris. Carefully detach and examine the brushbar‚ noting its orientation for correct re-installation.
Remove tangled materials and ensure free rotation before reinserting. A clean brushbar maximizes agitation and dirt removal during vacuuming.
Removing and Inspecting the Brushbar
To remove the brushbar‚ detach the brush head following the instructions in your DC14 owner’s manual. Typically‚ this involves releasing clips or screws. Once removed‚ carefully inspect the brushbar for tangled hair‚ threads‚ and other debris wrapped around the bristles.
Check for any damage to the bristles or the brushbar itself. Note the brushbar’s orientation before removal for easy re-installation.
Removing Hair and Debris
With the brushbar removed‚ use scissors or a seam ripper to carefully cut away tangled hair and debris. Avoid pulling‚ as this can damage the bristles. A small brush can help dislodge stubborn particles. Ensure all obstructions are cleared for optimal performance.
Inspect the brushbar ends for accumulated fluff and clean thoroughly. Reinstall the brushbar‚ ensuring correct orientation‚ before resuming vacuuming.
Optional Accessory Use and Maintenance
Motorized tools enhance cleaning on upholstery and stairs; follow usage guidelines for best results. Regularly check for blockages in these tools. Store accessories conveniently to prevent damage and ensure easy access.
Clean attachments with a damp cloth‚ avoiding harsh chemicals. Inspect hoses and wands for cracks or obstructions. Proper storage extends accessory lifespan and maintains peak performance.
Motorized Tools – Usage Guidelines
Motorized tools are ideal for deep cleaning carpets and upholstery. Ensure the brush bar is rotating freely before use. Avoid applying excessive pressure‚ allowing the tool to glide smoothly across surfaces.
Regularly inspect for tangled hair or debris obstructing the brush bar. Do not use on delicate fabrics that could be damaged. Always disconnect from the power supply before maintenance.
Accessory Storage
Proper accessory storage keeps your Dyson DC14 tools organized and readily accessible; Utilize a dedicated storage space‚ such as a closet or utility room. Consider wall-mounted options to save floor space.
Ensure tools are clean and dry before storing to prevent damage. Avoid storing in direct sunlight or extreme temperatures. Keep the wand and hose neatly coiled to avoid kinks.
Troubleshooting Tips – Common Issues and Solutions
Loss of suction is a frequent concern; check for blockages in the hose‚ wand‚ or brush head. Overheating can occur from excessive use or blocked airways – allow the machine to cool.
Ensure the bin is emptied and the filter is clean. If issues persist‚ consult the Dyson support resources or contact customer care for assistance. Regular maintenance prevents many problems.
Loss of Suction – Diagnosing the Problem
Reduced suction often indicates a blockage. First‚ empty the clear bin™. Then‚ meticulously inspect the hose‚ wand‚ and brush head for obstructions. A clogged filter significantly diminishes airflow; ensure it’s clean and dry.
Check for debris wrapped around the brushbar. Addressing these common issues typically restores optimal suction power to your Dyson DC14.
Overheating – Prevention and Resolution

Overheating usually stems from airflow restriction; Immediately power off and unplug your Dyson DC14. Thoroughly check for and remove any blockages in the hose‚ wand‚ or brush head. Ensure the filter is clean and completely dry before re-installation.
Allow the machine to cool completely before resuming use. Prevent future occurrences with regular maintenance and debris removal.
Understanding the Dyson DC14’s Technology
The Dyson DC14 utilizes Radial Root Cyclone™ technology‚ generating powerful centrifugal forces to effectively separate dust and dirt from the airflow. This maintains consistent suction throughout cleaning. Furthermore‚ the Clutch Motor System automatically adjusts brushbar height for optimal carpet and floor cleaning.
These innovations deliver superior cleaning performance and efficiency.
Radial Root Cyclone™ Technology Explained
Radial Root Cyclone™ technology is at the heart of the DC14’s powerful suction. Air and dirt are forced into a unique cyclone structure‚ creating intense centrifugal forces. This separates microscopic dust and allergens from the airflow without clogging filters.
This ensures consistent‚ fade-free suction‚ capturing even the smallest particles for a cleaner home environment‚ maximizing cleaning efficiency.
Clutch Motor System – How it Works
The DC14 features a sophisticated Clutch Motor System. This intelligently adjusts brushbar speed based on floor type. When transitioning from hard floors to carpets‚ the brushbar automatically increases speed for optimal agitation and dirt removal.
This prevents damage to delicate hard floors while maximizing cleaning power on carpets‚ offering a versatile and efficient cleaning experience.
Warranty Information – Coverage and Claims
Your Dyson DC14 is covered by a two-year limited warranty against defects in materials and workmanship. This warranty applies to private household use‚ adhering to the Owner’s Manual guidelines. It doesn’t cover damage from misuse or commercial application.
For warranty claims or customer care‚ contact Dyson directly. Proof of purchase is required for all warranty services.
Two-Year Limited Warranty Details
The two-year limited warranty for your Dyson DC14 begins on the date of purchase. It covers defects in materials and workmanship under normal household use. This warranty excludes consumable parts and damage resulting from accident‚ misuse‚ or unauthorized modification.
Dyson will‚ at its discretion‚ repair or replace the defective unit. The warranty is non-transferable and valid only with proof of purchase.
Customer Care Contact Information
For assistance with your Dyson DC14‚ please contact Dyson Customer Care. You can reach them via phone at 1-877-397-6622. Alternatively‚ visit the official Dyson website for online support‚ FAQs‚ and troubleshooting guides.
Their dedicated team is available to address your questions‚ warranty claims‚ and provide expert advice regarding your vacuum cleaner’s operation and maintenance.
DC14 PDF Manual Download Resources
Access your Dyson DC14 owner’s manual in PDF format through several convenient online resources. Begin with the official Dyson website‚ offering the most up-to-date version and additional support materials.
Alternatively‚ explore various third-party manual archive websites for historical versions or backups. These resources provide easy access to guides‚ specifications‚ and troubleshooting information for your vacuum.
Official Dyson Website

The official Dyson website is the primary source for your DC14 owner’s manual. Here‚ you’ll find the latest PDF version‚ ensuring accuracy and completeness.
Beyond the manual‚ explore detailed support articles‚ frequently asked questions‚ and video tutorials. Register your machine for exclusive content and streamlined customer service access. Benefit from Dyson’s direct support and resources.
Third-Party Manual Archives
Several online archives host Dyson DC14 owner’s manuals as PDF downloads. These can be useful if you’ve misplaced your original or require an older version.
However‚ verify the source’s reliability to ensure the manual is genuine and accurate. While convenient‚ these archives aren’t officially endorsed by Dyson‚ so prioritize the official website when possible.
Maximizing DC14 Performance – Tips and Tricks
To achieve peak suction‚ regularly empty the Clear Bin™ and wash the filter – ideally every wash cycle. Utilize the appropriate tools for different surfaces; the combination tool excels on upholstery‚ while the crevice tool reaches tight spaces.
Inspect the brushbar frequently for hair and debris‚ ensuring optimal agitation. A consistent maintenance schedule extends your DC14’s lifespan and cleaning efficacy.
Optimal Cleaning Techniques
Employ slow‚ deliberate strokes for maximum dirt pickup‚ allowing the Radial Root Cyclone™ technology to effectively separate dust and debris. Overlap cleaning paths slightly to ensure complete coverage. Utilize the wand for reaching under furniture and high areas.
Adjust the floor head setting based on the surface type – hard floors versus carpets – for optimal performance and brushbar engagement.
Regular Maintenance Schedule
Weekly: Empty the Clear Bin™ and check for blockages in the hose and wand. Monthly: Wash the filter thoroughly and allow it to dry completely (approximately 24 hours) before re-installation.
Every 3-6 months: Inspect the brushbar for hair and debris removal. Address any loss of suction promptly to maintain peak cleaning performance and extend the lifespan of your DC14.