
acer swift go 14 user manual
Acer Swift Go 14 User Manual: A Comprehensive Guide
Welcome! This manual provides detailed instructions for your Acer Swift Go 14, covering setup, features, troubleshooting, and essential information for optimal performance and enjoyment․

The Acer Swift Go 14 represents a compelling blend of portability, performance, and style, designed for users seeking a versatile computing experience․ This laptop distinguishes itself as a “stealth performer,” offering substantial capabilities within a midrange price point, starting at $699 and reaching $899 for configured models like the SFG14-63T-R1F4․ It’s engineered for both everyday tasks and more demanding applications, making it suitable for students, professionals, and anyone prioritizing on-the-go productivity․

Digital Trends highlights its sleek design and vibrant display, while CNET’s expert reviews underscore its reliability․ Notably, certain Acer models – including Lite versions of Aspire, Swift, and Nitro – do not support AcerSense, NitroSense, or the Acer Care Center․ However, the standard Swift Go 14 provides a comprehensive user experience, backed by Acer’s commitment to quality and support․ This manual will guide you through maximizing your Swift Go 14’s potential․
Unboxing and Initial Setup
Upon receiving your Acer Swift Go 14, carefully inspect the box for any signs of damage․ Inside, you’ll find the laptop itself, a power adapter, and potentially accompanying documentation․ Before powering on, locate the power port and connect the adapter to begin charging the battery․ Initial charging may take several hours․
Once connected, press the power button – typically located on the keyboard deck – to initiate the startup process․ Follow the on-screen prompts to select your region, language, and keyboard layout․ You’ll then be guided through connecting to a Wi-Fi network․ Acer provides resources for driver and application downloads from their support website, ensuring your system is up-to-date․ Remember that certain Lite models lack support for Acer’s utility applications like Acer Care Center․
System Specifications Overview
The Acer Swift Go 14 boasts a range of configurations designed to meet diverse user needs․ Core components include the processor and memory, impacting overall performance․ Expect options ranging from Intel Core i5 to i7 processors, paired with 8GB or 16GB of LPDDR5 RAM for smooth multitasking․ Storage options typically involve a fast NVMe PCIe SSD, offering capacities from 512GB up to 1TB, ensuring quick boot times and application loading․
The display is a key feature, often a 14-inch OLED panel with vibrant colors and sharp resolution․ Connectivity includes Wi-Fi 6E and Bluetooth for wireless communication․ Specific configurations, like the AI version, may offer enhanced features․ Note that Acer Aspire Lite, Swift Lite, and Nitro Lite models may have limited software support, lacking AcerSense or Acer Care Center․
Processor and Memory
The Acer Swift Go 14’s performance hinges on its processor and memory configuration․ Typically, models feature Intel Core i5 or i7 processors, delivering a balance of power and efficiency for everyday tasks and demanding applications․ These processors are designed to handle multitasking, content creation, and even light gaming with ease․
Memory options generally include 8GB or 16GB of LPDDR5 RAM․ The LPDDR5 standard ensures faster data transfer rates and improved energy efficiency compared to older RAM types․ Sufficient RAM is crucial for smooth operation, especially when running multiple programs simultaneously or working with large files․ The combination of a capable processor and ample RAM contributes to a responsive and enjoyable user experience․
Storage and Display
The Acer Swift Go 14 typically offers a 512GB or 1TB PCIe NVMe SSD for storage, providing rapid boot times, application loading, and file transfers․ SSDs are significantly faster and more durable than traditional hard drives, enhancing overall system responsiveness․ The display is a key feature, often a 14-inch OLED panel with a resolution of 2․8K (2880 x 1800) or higher․
These displays boast vibrant colors, deep blacks, and excellent viewing angles, making them ideal for multimedia consumption and creative work․ Many models also feature a high refresh rate (90Hz or 120Hz) for smoother visuals․ The combination of fast storage and a high-quality display delivers a premium user experience, catering to both productivity and entertainment needs․
Powering On and Off
To power on your Acer Swift Go 14, locate the power button – typically situated on the upper-right corner of the keyboard or along the side edge of the laptop․ Press and hold the power button for a few seconds until the Acer logo appears on the screen․ The system will then boot up into the operating system․ To initiate a proper shutdown, click the Windows Start button, select the Power icon, and choose “Shut down․”
Avoid forcibly shutting down the laptop by holding the power button, as this can lead to data loss or system corruption․ Alternatively, you can access shutdown options through the Ctrl+Alt+Delete menu․ For sleep mode, use the Power icon and select “Sleep․” Regularly shutting down your laptop ensures optimal performance and longevity․
Navigating the Operating System

Your Acer Swift Go 14 comes pre-installed with Windows, offering a user-friendly interface․ The Start Menu, accessed via the Windows icon, provides access to installed applications, settings, and power options․ Utilize the Taskbar at the bottom of the screen for quick access to frequently used programs and system notifications․ The Action Center, accessible through the notification icon, displays alerts and quick settings․
Explore the Settings app (Windows key + I) to customize your experience, including display, network, and personalization options․ Familiarize yourself with File Explorer for managing files and folders․ Utilize the search bar for quickly locating applications and documents․ Regularly updating Windows ensures optimal performance and security․
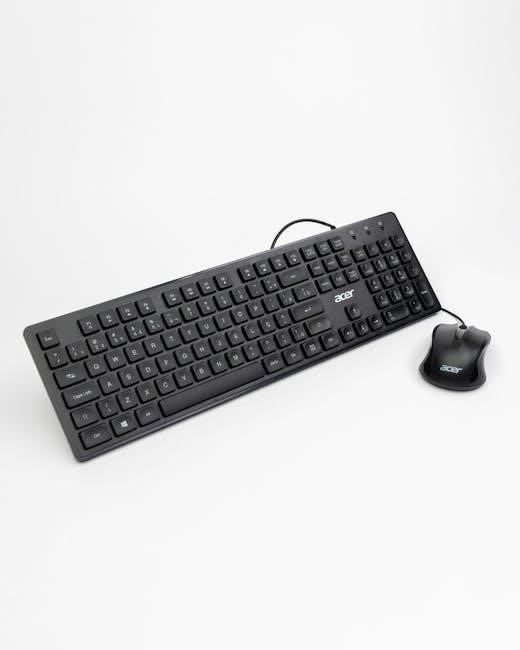
Understanding the Touchpad and Keyboard
The Acer Swift Go 14 features a precision touchpad supporting multi-finger gestures․ Utilize single-finger taps for clicking, two-finger scrolling for navigating documents, and three-finger swipes for switching between applications․ Customize touchpad settings, such as sensitivity and gesture assignments, within the Windows Settings app․
The backlit keyboard offers comfortable typing with adjustable brightness levels․ Access keyboard shortcuts, like Fn + F keys, for controlling volume, brightness, and other system functions․ The keyboard layout is designed for efficient typing, and key customization options may be available through third-party software․ Regularly clean both the touchpad and keyboard to maintain optimal responsiveness․
Connecting to Wireless Networks (Wi-Fi)
To connect to a Wi-Fi network, click the Wi-Fi icon in the system tray (lower-right corner of the screen)․ A list of available networks will appear․ Select your desired network and enter the password if prompted․ Ensure the Wi-Fi adapter is enabled through the Windows Settings app under Network & Internet․
For optimal performance, position your Acer Swift Go 14 close to the Wi-Fi router; If experiencing connectivity issues, try restarting both your laptop and the router․ You can also troubleshoot network problems using the Windows Network Troubleshooter․ Consider updating your Wi-Fi driver from the Acer Support website for improved stability and speed․
Bluetooth Pairing and Usage
To pair a Bluetooth device, navigate to Windows Settings > Devices > Bluetooth & other devices․ Ensure Bluetooth is toggled ‘On’․ Your Acer Swift Go 14 will begin searching for nearby devices․ Select the device you wish to pair from the list․ You may be prompted to enter a pairing code (PIN) – refer to your device’s manual for this code․
Once paired, the device will connect automatically when in range․ Manage paired devices within the Bluetooth settings․ Troubleshooting pairing issues? Ensure the device is in pairing mode, remove any conflicting devices, and update your Bluetooth drivers via Acer Support․ Bluetooth enables wireless connections for headphones, speakers, and other peripherals․
Acer Care Center: System Maintenance
Acer Care Center is a pre-installed application providing system information and maintenance tools․ Access it via the Start Menu․ It offers a system overview, displaying hardware details and status․ Utilize the ‘Update’ feature to check for and install driver and software updates, ensuring optimal performance and security․ The ‘Diagnostics’ tool allows you to scan for hardware issues․
Regularly use Acer Care Center to monitor system health and address potential problems proactively․ Note that Acer Aspire Lite, Swift Lite, and Nitro Lite models may not support Acer Care Center․ Keep the application updated for the latest features and improvements․ It’s a central hub for maintaining your Acer Swift Go 14․
Driver Installation and Updates
Maintaining up-to-date drivers is crucial for optimal performance and stability․ Acer provides drivers through its support website․ Regularly check for updates, as Acer publishes the latest software and driver updates in the support section of their website․ You can restore all Acer product drivers and applications from there․
Downloading Drivers from Acer Support: Visit the Acer support website, enter your model number (Swift Go 14), and navigate to the ‘Drivers and Downloads’ section․ Select your operating system to filter compatible drivers․ Installing Downloaded Drivers: Run the downloaded executable file and follow the on-screen instructions․ Restart your system if prompted to complete the installation․
Downloading Drivers from Acer Support
To ensure your Acer Swift Go 14 operates flawlessly, regularly downloading the latest drivers from the official Acer support website is essential․ Begin by visiting the Acer support portal and accurately entering your specific model number – crucial for receiving compatible updates․ Navigate to the dedicated ‘Drivers and Downloads’ section, where a comprehensive list of available drivers is presented․
Before downloading, carefully select your operating system from the provided options to filter the results and guarantee compatibility․ Acer offers a wide range of drivers, including those for graphics, audio, network, and chipset components․ Download each necessary driver individually, or utilize the Acer driver update utility for a streamlined process․
Installing Downloaded Drivers
After successfully downloading the necessary drivers from the Acer support website, the installation process is straightforward․ Locate the downloaded files, typically in your ‘Downloads’ folder, and double-click the executable (․exe) file to initiate the setup wizard․ Follow the on-screen prompts carefully, accepting license agreements and choosing your preferred installation directory․
During installation, it’s recommended to avoid interrupting the process and refrain from opening other resource-intensive applications․ Some drivers may require a system restart to fully implement the changes․ After installation, verify the driver’s functionality through Device Manager to confirm successful integration․ Acer consistently publishes updates, so repeat this process periodically․
Display Settings and Customization
The Acer Swift Go 14 offers extensive display customization options accessible through the Windows Settings app․ Navigate to ‘System’ then ‘Display’ to adjust screen resolution, orientation, and scaling․ Experiment with different resolutions to find the optimal balance between clarity and screen real estate․ Adjust scaling for comfortable viewing, especially on the vibrant display․
Further customization includes brightness and color calibration․ Utilize the built-in Windows color calibration tool or Acer’s proprietary software (if available) for precise color accuracy․ Explore advanced settings like HDR (High Dynamic Range) support for compatible content, enhancing visual fidelity․ Remember to save your preferred settings for a consistent viewing experience․
Audio and Video Configuration
The Acer Swift Go 14 provides versatile audio and video configuration options․ Access these settings through the Windows ‘Settings’ app, navigating to ‘System’ then ‘Sound’ for audio controls․ Here, you can select your preferred output device (speakers or headphones), adjust volume levels, and configure spatial sound options for an immersive experience․
For video settings, explore the ‘Display’ section within ‘System’․ Adjust video playback settings, including resolution and refresh rate, to optimize performance and visual quality․ Ensure compatible codecs are installed for smooth playback of various video formats․ Utilize Acer’s accompanying software, if present, for enhanced audio-visual profiles tailored to specific content types, maximizing your entertainment experience․
Using the Webcam and Microphone
The Acer Swift Go 14 integrates a webcam and microphone for video conferencing, online classes, and content creation․ To access the webcam, open the ‘Camera’ app from the Windows Start menu․ Ensure the privacy shutter (if equipped) is open․ Adjust webcam settings like brightness and contrast within the app or through Windows ‘Settings’ under ‘Privacy’ then ‘Camera’․
For microphone usage, select your preferred microphone input within ‘Sound’ settings․ Test the microphone to confirm proper functionality․ Adjust microphone levels to ensure clear audio during calls or recordings․ Many applications offer individual microphone settings; explore these for optimal performance․ Remember to grant applications permission to access your camera and microphone through Windows privacy settings․
Battery Management and Charging
The Acer Swift Go 14 utilizes a lithium-ion battery, offering portability and extended use․ To maximize battery life, adjust power settings in Windows – choose ‘Battery saver’ mode when unplugged․ Reduce screen brightness and close unused applications․ Acer Care Center may offer additional battery optimization tools․
Charging is accomplished via the included USB-C power adapter․ A full charge typically takes several hours; charging time varies based on usage․ Avoid prolonged exposure to extreme temperatures while charging․ It’s recommended to periodically calibrate the battery by fully charging and then fully discharging it․ Regularly check battery health within Acer Care Center for potential issues and replacements․
Troubleshooting Common Issues
Display Problems: If the screen is blank, ensure the brightness is adjusted and the laptop is powered on․ For distorted images, update your graphics drivers via Acer Support․ Connectivity Issues: If Wi-Fi fails, verify the router is functioning and the correct password is entered․ Resetting the network adapter can also help․ Bluetooth pairing problems may require restarting both devices․

General Issues: If the system freezes, try a forced shutdown (hold the power button)․ Utilize Acer Care Center for system diagnostics and driver updates․ If problems persist, consider a system restore․ Remember that Acer Aspire Lite, Swift Lite, and Nitro Lite models may lack AcerSense/Care Center support․ Refer to Acer’s support website for detailed solutions and FAQs․
Addressing Display Problems

Blank Screen: First, confirm the power adapter is connected and the laptop is fully charged․ Adjust the screen brightness using the function keys; it may be set to minimum․ If still blank, try restarting the device․ Distorted Images: Outdated or corrupted graphics drivers are often the cause․ Download and install the latest drivers from the Acer Support website․ Ensure compatibility with your operating system․
Flickering or Lines: Check the display cable connection (if applicable, for external monitors)․ Run a display diagnostic test within the Acer Care Center (if available on your model)․ If the issue persists, contact Acer support for potential hardware repair․ A vibrant display is a key feature, so maintaining its quality is crucial․
Resolving Connectivity Issues
Wi-Fi Problems: Ensure Wi-Fi is enabled via the function keys or Windows settings․ Verify you’re entering the correct password․ Restart your router and the laptop․ Update your Wi-Fi driver from the Acer Support website․ Check for interference from other devices․ Bluetooth Issues: Confirm Bluetooth is enabled on both devices․ Remove and re-pair the devices․ Update the Bluetooth driver․ Ensure devices are within range․
Network Discovery: Check Windows firewall settings to allow network discovery․ Run the Windows Network Troubleshooter․ If problems persist, consult your internet service provider․ Stable connectivity is vital for accessing online resources and maximizing your Swift Go 14’s capabilities․
Acer NitroSense (If Applicable)
Through NitroSense, users can customize their laptop’s thermal profile, balancing cooling efficiency with performance demands․ It provides a user-friendly interface for controlling system behavior․ If NitroSense isn’t present, Acer Care Center offers similar system monitoring features․

Understanding Fan Control and Performance
The Acer Swift Go 14 utilizes a sophisticated cooling system to maintain optimal performance during demanding tasks․ While direct fan control might be limited without NitroSense (available on select models), the system dynamically adjusts fan speeds based on internal temperatures․ This ensures efficient heat dissipation and prevents overheating․
Performance is balanced to provide a smooth user experience․ Acer Care Center can offer insights into system temperatures and resource usage․ Prolonged intensive tasks may cause the fan to become more audible, which is normal operation․ Proper ventilation is crucial; avoid blocking air vents․
Data Backup and Recovery Options
Protecting your valuable data is paramount․ The Acer Swift Go 14 supports multiple backup solutions․ Utilize Windows’ built-in File History feature for automatic backups to an external drive․ Consider cloud storage services like OneDrive for offsite protection, safeguarding against physical damage or theft․ Acer Care Center may offer integrated backup tools, depending on your model․
For recovery, Windows offers System Restore points, allowing you to revert to a previous state․ Create a recovery drive using a USB flash drive to restore your system even if Windows becomes unbootable․ Regularly test your backups to ensure their integrity․ Remember to securely erase sensitive data before disposal․
Safety Precautions and Warranty Information
Important Safety Instructions: Avoid using the Acer Swift Go 14 in extreme temperatures or humid environments․ Do not block ventilation openings to prevent overheating․ Disconnect the power adapter during lightning storms․ Handle the device with care to avoid physical damage․ Do not attempt to disassemble or repair the laptop yourself, as this will void the warranty․
Warranty Details: Your Acer Swift Go 14 is covered by a standard one-year limited warranty against manufacturing defects․ This warranty does not cover accidental damage or misuse․ Refer to the included warranty card or visit the Acer support website for complete terms and conditions․ Register your product online to activate your warranty and access additional support resources․
Contacting Acer Support

Need Assistance? Acer provides multiple channels for customer support․ For immediate help, visit the official Acer Support website at https://www․acer․com/support․ Here, you’ll find FAQs, troubleshooting guides, driver downloads, and access to the Acer Community forum․ You can also initiate a live chat with a support representative․
Phone Support: For direct assistance, call Acer’s customer service hotline․ Numbers vary by region; consult the Acer website for the appropriate contact number in your location․ Email Support: Submit a support request via the Acer website’s contact form, detailing your issue for a prompt response․ Ensure to have your serial number ready for efficient service․